Map Toolbars
Toolbars around map borders can be activated/deactivated and placed/floated where you prefer. The toolbars provide shortcuts for program functions.
- For any tool on a toolbar, the same functionality can always be found in a main menu ribbon.
- Individual toolbars can be switched on and off. MIKE+ saves the current toolbar combination for the next MIKE+ session.
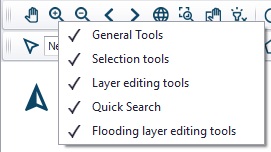
- Activate a map toolbar by right-clicking on an active toolbar and selecting from the list of available map toolbars shown.
- Re-set the displayed map toolbars on the main Map via the ‘Reset toolbars’ option from the Map local context menu (i.e. right-click on the main Map).
The displayed toolbars get automatically activated or de-activated (greyed-out) according to the presently active graphical window or dialog.
For customizing, see chapter Customizing the User Interface. Also see chapter Toolbars for details on tools and toolbars.
General Tools

Offers quick access to tools for navigating around the Map, querying model element properties, and creating profile plots from the main Map. The tools are described in Chapter 2.9.3 Map Menu (p. 67).
- Pan
- Zoom in
- Zoom out
- Zoom to previous
- Zoom to next
- Zoom to full extent
- Zoom to selection
- Pan selection
- Clear highlighted
- Identify: Activate this option and click an element on the map to show its properties in the Property view. If a model element (e.g. pipe or node) exists at this location on the map, it will display this element's properties. If simulation results are available, then they will also be visible in this Property view. If no model element exists at the clicked location, or if the layer is not visible or not selectable, the Identify tool will select items from background feature layers
- Open layer editor
- Network connectivity
- Set flags
- Profile manager
- Measure
Selection Tools
Presents shortcuts to tools for selecting model elements from the main Map for e.g. editing or further processing. Also see the section on Selection) for further information.

- Selection filtering
- Selection manager
- Select by click
- Select by rectangle
- Select by polygon
- Clear selection
- Invert selection: inverts the selection within a feature layer
- Move selection
- Delete selection
- Reverse selected links
- Merge selection
- Split selected links
- Connect selected demand allocations. For WD models.
- Connect selected pumps to pump station. For WD models.
- Clip catchments by selection. For CS models.
- Erase catchments by selection. For CS models.
- Connect selected load points. For CS models.
- Connect selected catchments. For CS models.
Layer Editing Tools

Provides easy access to data layer editing tools on the Map. Also refer to Chapters CS/WD Network and Catchments Menu for more details on the tools listed below.
- Create
- Edit
- Delete
- Split
- Reverse link
- Append catchment. For CS models.
- Clip catchment.For CS models.
- Erase catchments. For CS models.
- Connect catchment. For CS models.
- Connect demand allocation. For WD models.
- Connect pump station. For WD models
- Delete catchment connection
- Connect station
- Change element type
- Open/Close element. For CS models. This tool ticks/unticks the ‘Enabled’ parameter for Pipes and Canals. This option is useful for simulating, e.g. link blocking or removal scenarios.
Quick Search
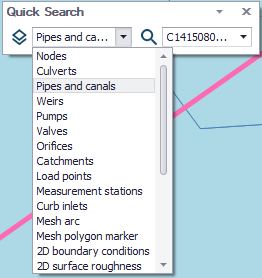
Option for quickly finding model elements on the Map. The tool zooms into and highlights (in pink) the specified element on the main Map.