Background Map
The Background Map editor allows the user to select a background image to show on the Map view.
Activate a background map overlay by ticking the ‘Background map visible’ checkbox on the editor. When a background map is visible, increasing the 'Transparency' with the corresponding cursor fades out the background map, e.g. to increase the visibility of model data.
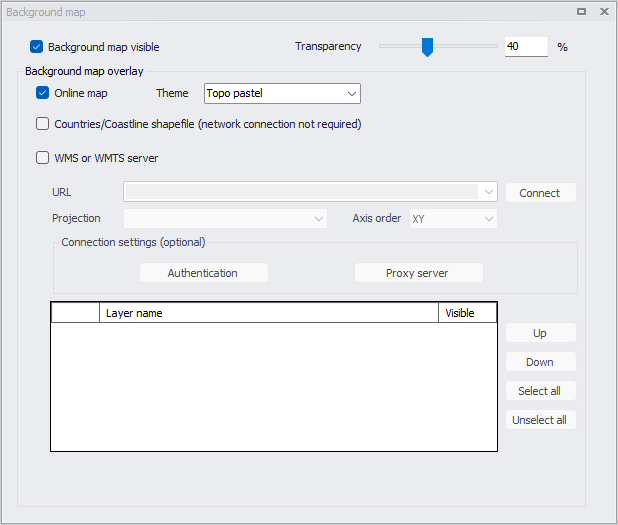
Figure: The Background Map editor
The following background map overlays are available:
- Online map: This offers a list of themes (including e.g. street maps, satellite image, terrain, etc.) obtained from web services. The theme can be selected from the drop-down list after ticking the 'Online map' option.
- Countries/Coastline Shapefile: Polygon feature showing coastlines and demarcating oceans and inland areas.
- WMS or WMTS server: Background maps obtained from a remote server. Enter the URL of the server or select it from the list of previously used URLs, and click 'Connect'. If the server is a private server, you will need to supply the user name and password by using the ‘Authentication’ button, and you may optionally tick 'Save password' in order not to enter it again the next time you open MIKE+. If your network uses a proxy server, you will need to press the 'Proxy server' button to provide the server address (which should include the port number, if any) as well as optional user name and password for this proxy server. When the connection is established, the table will provide the list of layers available on the WMS or WMTS server, and it is possible to select which layers to display in MIKE+ using the 'Visible' box. The list of projections will show the map projection(s) supported by the server, and the one used for the model data in MIKE+ will be selected if possible. Note that displaying layers from a WMS or WMTS server requires that the MIKE+ project uses the same map projection as the WMS or WMTS layers: if the projection used in MIKE+ doesn't match any of the projections supported by the server, you will be asked to update the map projection in MIKE+. Also note that it is only possible to connect to servers using projected map projections (geographical coordinate systems not supported). An axis order also needs to be specified, defining the format of the coordinates on the server: most of the servers provide coordinates in the XY order, but some servers provide coordinates in the opposite order and in this case the option must be changed to 'YX' otherwise the layers won't be displayed on the map.
An internet connection must be available for Online map and WMS / WMTS server overlays.
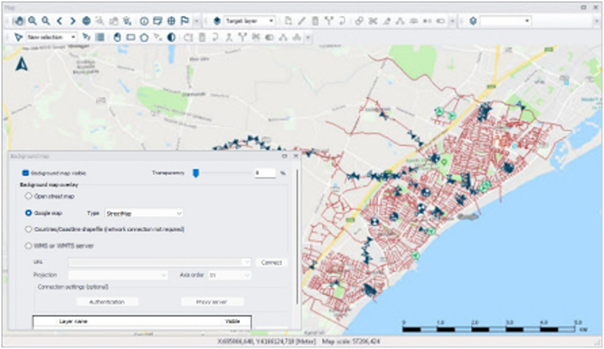
Figure: An example Online map background on the Map view
Note
Because the proxy server settings are related to your local network and not to the model database, these settings are stored on the local machine instead of the MIKE+ project files. That means that the specified settings will then apply to other MIKE+ projects opened on the same computer. On the opposite, the proxy settings will have to be supplied again if the same model database is later opened from another computer connected to the same network.
Info
While connecting to WMS or WMTS servers, in case of connection errors, it is possible to save the connection information to a log file. To enable this, start by opening the file “%appdata%\Roaming\DHI\MIKE+\20xx\DHI.MIKEPlus.Shell.Settings.json, and set its option 'SaveWMSLog' to true. The information from the following connections will be saved in a log file named with the MIKE+ database name, in the folder "%appdata%\Roaming\DHI\MIKE+\BackgroundMapCache\WmsRasterLayer" for WMS connections and in the folder “%appdata%\Roaming\DHI\MIKE+\BackgroundMapCache\WmtsRasterLayer” for WMTS connections.